How to run Facebook Ads
Here are the detailed steps on how to set up Facebook Advertising
Understand that these steps are just a how to guide and not a recommendation for your business’s particular ad campaign. You will need to research and make specific ad decisions (ad spend, audience, etc) on your own.
It’s important to note that you can not run a Facebook ads account if you don’t have a Facebook Business Page. eMerchantClub.com offers Facebook Business Page management services. Call now to inquire about this service: 831-618-0898
If you want to build the page yourself here are the steps:
Creating a Facebook Business Page:
- Log into Facebook: If you don’t have a Facebook account, create one by going to www.facebook.com and following the prompts to create a personal account.
- Go to Facebook Business Pages: Once you’re logged in to Facebook, go to www.facebook.com/pages/create.php or click on “Create” in the top-right corner of Facebook and select “Page” from the dropdown menu.
- Choose a Page type: Select the type of Facebook Business Page you want to create from the available options. The most common types of pages are “Business or Brand” and “Community or Public Figure”.
- Add your business information: Enter your business name, category, and contact information. Make sure your business name and contact information are accurate and consistent with your other online profiles.
- Upload a profile picture and cover photo: Choose images that represent your brand and make a good first impression on potential customers. Your profile picture should be at least 180 x 180 pixels, and your cover photo should be at least 820 x 312 pixels.
- Add a description: Write a brief description of your business that highlights your products or services and gives potential customers a sense of what you offer.
- Customize your Page: Once your Page is created, you can customize it by adding a call-to-action button, posting content, and engaging with your audience.
- Verify your Page: Verify your Page by going to Settings > Page Verification and following the prompts to confirm your business information.
Set up a Facebook Ads account:
If you don’t have one already, go to the Facebook Ads Manager website and sign up for an account. You’ll need to link your Facebook Business page to your Ads account (we recommend signing into your Facebook page first) Meta for Business: Marketing on Facebook

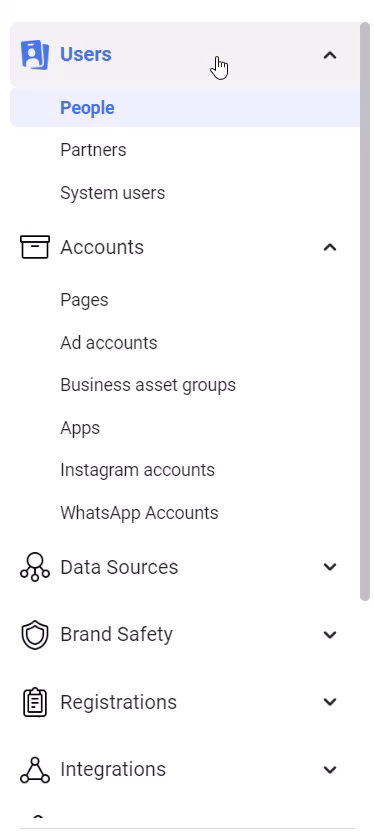
Link your Business Page to your Ads account: In the Ads Manager, click on “Settings” in the top-left corner and then click on “Ad Accounts” in the left-hand menu. Click on “Add New Ad Accounts” and select “Add a Page” to link your Business Page to your Ads account.
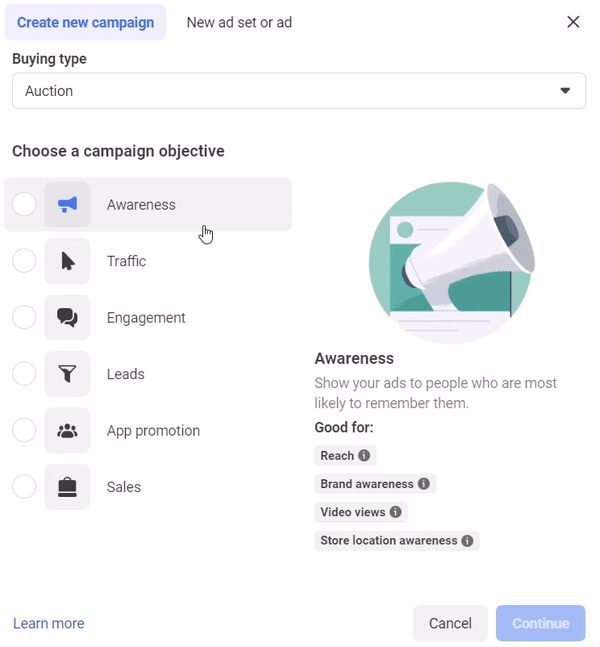
Choose your ad objective: Click on “Create” in the Ads Manager to start a new campaign. Choose your advertising objective based on your business goals, such as increasing website traffic, generating leads, or boosting sales.

Define Campaign Objective: Do you want Leads, Engagement, Sales, or Traffic? Make a selection and click continue.
Name your campaign and review your Campaign Objectives. You can also dictate here if you want to set a campaign spending limit. Click Next

Next, you will dictate where your conversions will be located. On Facebook, on your website, or another option. If you select website Facebook will provide you with a pixel for tracking purposes.

Next, you will set your Budget & Ad Schedule. Here you can set a lifetime budget for your campaign or a daily budget for your campaign. We recommend starting with a daily budget so you can closely monitor the performance of your campaign without the outside risk of overspending in a short period of time. Please be advised that the Daily Budget is a guideline for Facebook Ads and it is possible that you will very slightly exceed that budget or not fulfill that budget some days.

After you set your budget, set your start date of the campaign. You can also set an end date if you like. Keep in mind, you can pause any campaign whenever you want after the campaign is published.
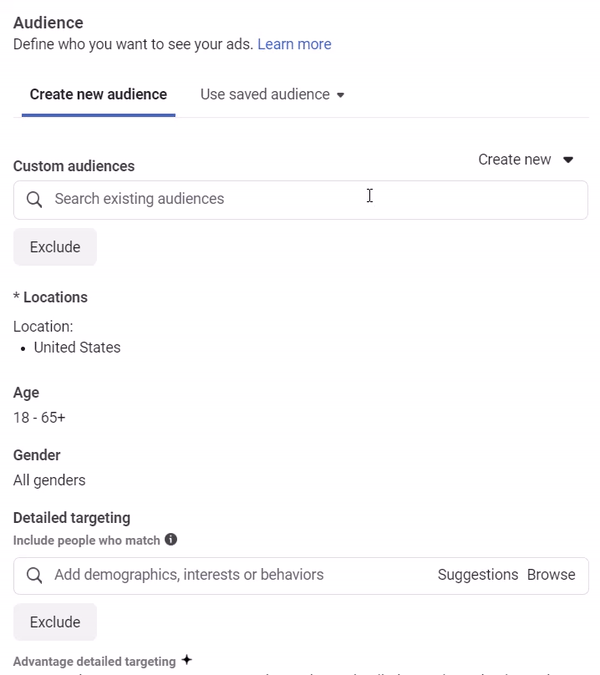
Now it’s time to define your target audience: Choose your target audience based on demographics, interests, behaviors, and more. Use the targeting options available in the Ads Manager to refine your audience and increase the effectiveness of your ads. Use the ‘Detailed Targeting’ search bar to narrow or broaden your audience. You can enter something like Online Shoppers.
Select ad placement and format: Choose the placement and format of your ad, such as in the News Feed, on Instagram, or as a video ad. Choose the format that best aligns with your campaign objectives and the preferences of your target audience. We recommend going with Advantage + Placements (recommended)
Click Next
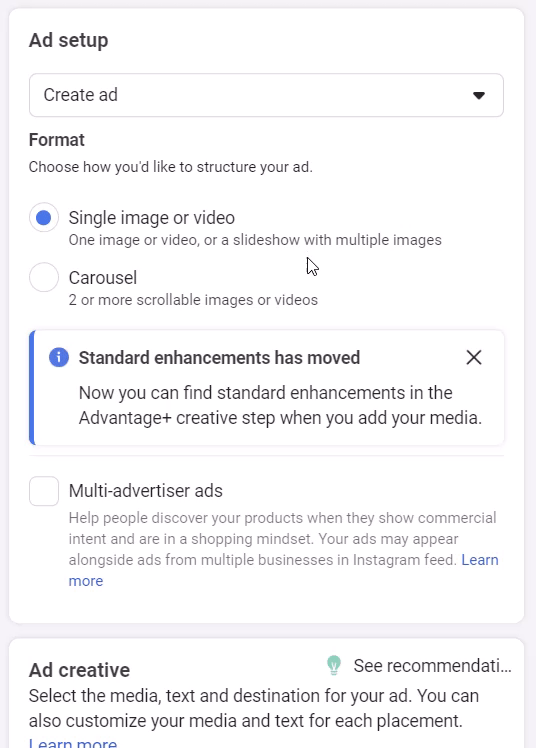
Now time to create your ad: Follow the prompts to create your ad. This will include uploading your image or video, writing your ad copy, and choosing your call-to-action. You can preview your ad to make sure it looks and works as intended.
When you are satisfied with your ad creative you can click Publish to start running your ad. Facebook automatically reviews all Facebook Ads before they go live. This process can take up to 24 hours.
Recommendations:
We highly recommend closely monitoring your Facebook Ads campaigns. Hopefully you are able to generate a low cost per lead and traffic to your website. Ultimately, you are spending money for these ads, so make sure you have a way to capture the leads information (name, email, phone) so you can remarket to these interested shoppers.